- A computer with a modern browser (Chrome/Edge/Safari)
- An email address (for your GitHub account)
- No installs required—we’ll use the GitHub website
Module 0 — Setup
Let’s get your tools ready so you can learn smoothly and share your work.
Step A
Create GitHub
Make an account and enable 2FA for security.
Step B
Fork the course
You’ll work in your own copy and submit changes via PR.
Step C
Learner Card
Add a short intro page under docs/learners/.
A Summer Story: Maps, Pulses, and “Whoa!”
You push open the lab door and see a glowing 3D brain on screen—smooth folds, crisp shadows.
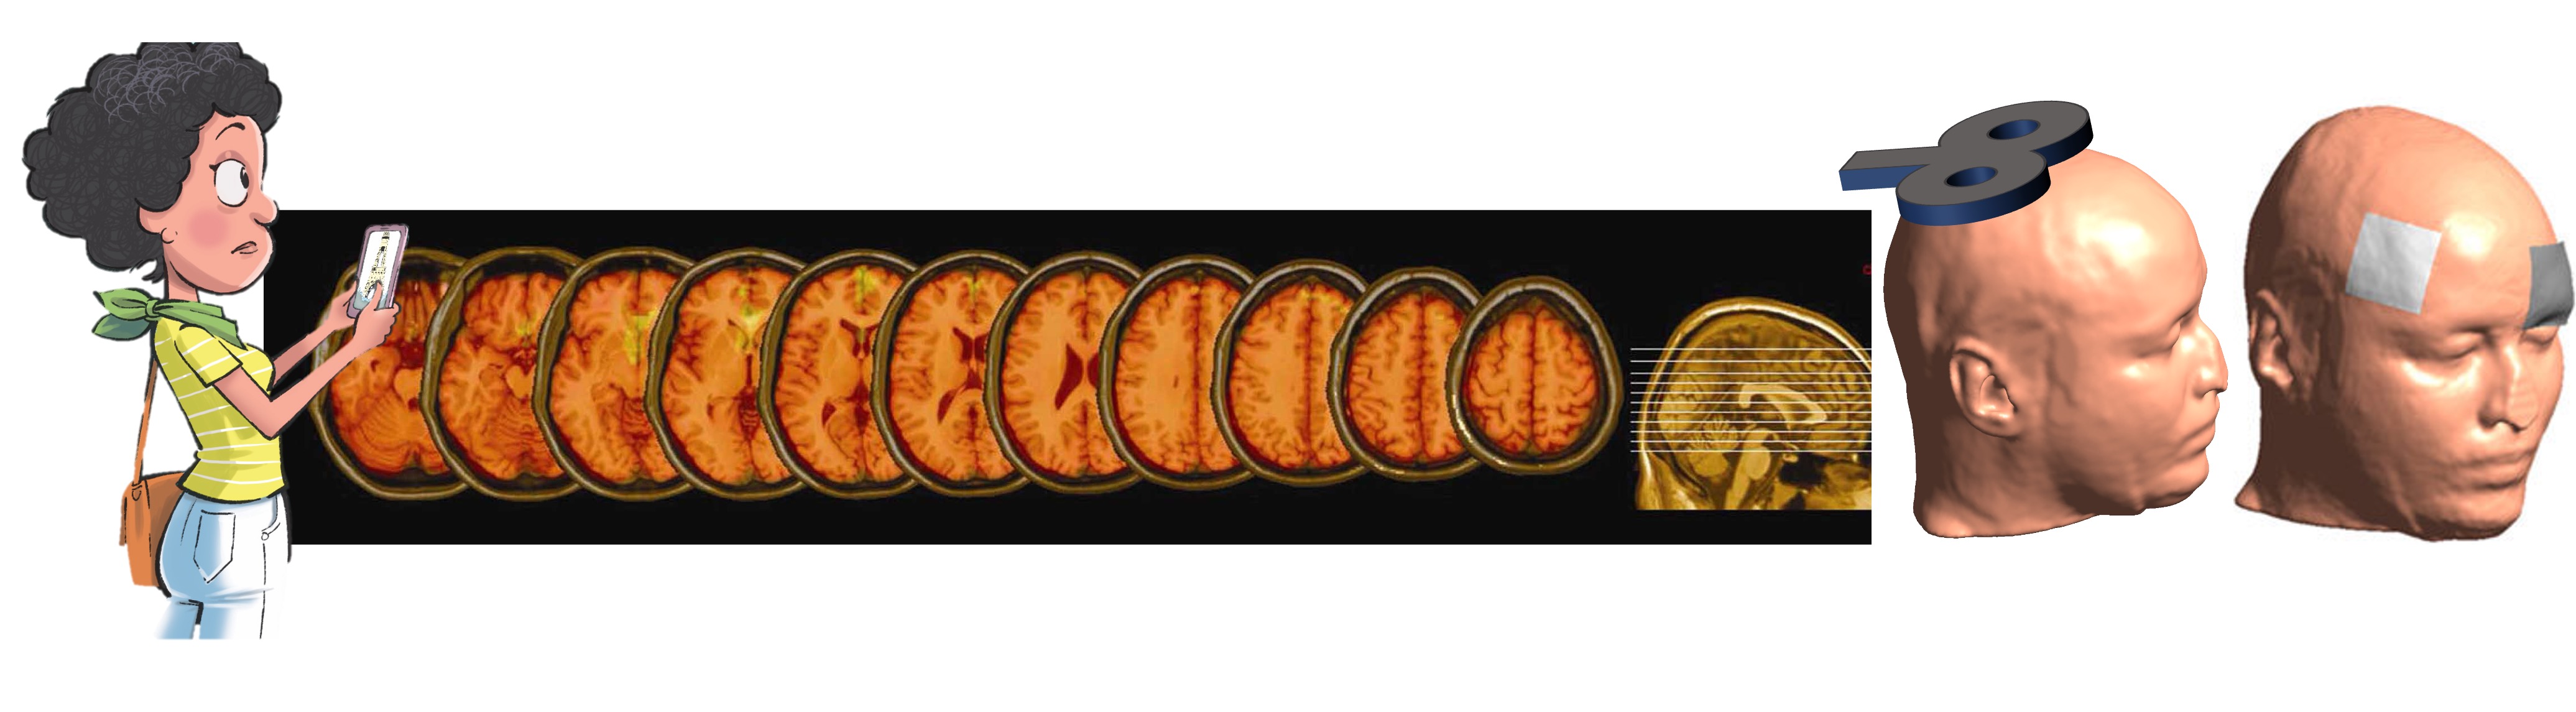
Figure 1. Structural MRI (the map) with an fMRI overlay (activity patterns). Right side, two types of noninvasive brain stimulation: Transcranial magnetic (TMS) and electrical (tES) stimulation.
“Structural MRI,” someone says. “It’s the map.” You scroll through slices like pages in a book—top to bottom, left to right—and suddenly anatomy feels navigable.
Next comes a color overlay: fMRI. Warm reds bloom over cortex during a simple task. “These aren’t thoughts,” your mentor smiles, “they’re oxygen changes when networks work.”
By week two, you’re planning tDCS like a flight path—electrode positions, currents, and safety rules—then visualizing how the electric field spreads across a head model. No sparks, no sci-fi—just careful parameters and good questions.
Finally: TMS. You hear the coil’s click, see a crosshair on the brain map, and watch how precise targeting works. It’s methodical and surprisingly beautiful: maps, models, and measurable effects.
On demo day, your team presents a clean figure that tells a tiny, true story about the brain. You came for a summer program. You leave speaking “brain maps.” 🧠✨
What you need
Step 1 — Create (or sign in to) a GitHub account
- Go to github.com → Sign up (or Sign in).
- Set your display name and add a friendly profile picture.
- (Recommended) Turn on 2-factor authentication: Settings → Password and authentication → Enable 2FA.
Step 2 — Fork this course repository
- Open the course repo in your browser (the link your mentor provided).
- Click Fork (top right). This makes your copy under your account.
You’ll do your work in your fork and submit it back via a Pull Request.
Step 3 — Add a “Learner Card” via the web editor
We’ll add a tiny Markdown page with your info.
- In your fork, open:
docs/→learners/(create it if missing). - Add a new file: Add file → Create new file.
- Name it exactly:
docs/learners/<your-github-username>.md
Example:docs/learners/brainstudent123.md - Paste and fill this template:
---
title: Learner Card — <Your Name>
layout: default
---

# Hi, I’m <Your Name> 👋

- **School / Grade:** <e.g., Central HS, Grade 11>
- **Why I’m here:** <one or two sentences>
- **Interests:** <e.g., neuroscience, coding, design, sports>
- **Fun fact:** <optional>

_I agree to be kind, curious, and careful with data._
At the bottom, choose Create a new branch → name it module0-<your-username> → Propose changes.
Step 4 — Open a Pull Request (PR)
- After proposing changes, click Compare & pull request.
- Title your PR:
[M0] Add learner card for <your-username>. - In the PR description, include a one-sentence summary and this checklist:
- [ ] I created/updated my GitHub account
- [ ] I added docs/learners/<my-username>.md
- [ ] I opened a PR for Module 0
Your mentor will review and leave comments. You’ll make edits until it’s approved and merged.
Step 5 — Say hello (Issues)
- Go to the Issues tab (in your fork or the main course repo—follow mentor preference).
- Click New issue and title it:
[M0] Hello from <your-username>. - Write 1–2 sentences about what you hope to learn. Submit.
(Optional) Enable Pages on your fork
- In your fork, go to Settings → Pages.
- Source: Deploy from a branch.
- Branch:
main, Folder:/docs→ Save. - Your site:
https://<your-username>.github.io/<your-fork-name>/
What to turn in (Module 0) + Rubric
Turn in:
- A Pull Request that adds
docs/learners/<your-username>.mdwith the template filled in. - A “Hello” Issue titled
[M0] Hello from <your-username>.
Rubric:
- Complete (✓) — Learner card via PR (correct path/name), intro filled, PR opened, and hello Issue posted.
- Needs revision (△) — Missing path/PR, or template incomplete.
- Try again (✗) — No PR and no Issue.